Table of Contents
Learn to build emergency shelters from natural materials. Step-by-step instructions for debris huts, lean-tos, snow caves, and other survival shelters.
Jordan Myers
Learn to build emergency shelters from natural materials. Step-by-step instructions for debris huts, lean-tos, snow caves, and other survival shelters.
Shelter is your second priority in a survival situation after medical needs. Exposure kills faster than thirst or hunger. Knowing how to build an effective emergency shelter from natural materials can mean the difference between surviving a night outdoors and suffering from hypothermia.
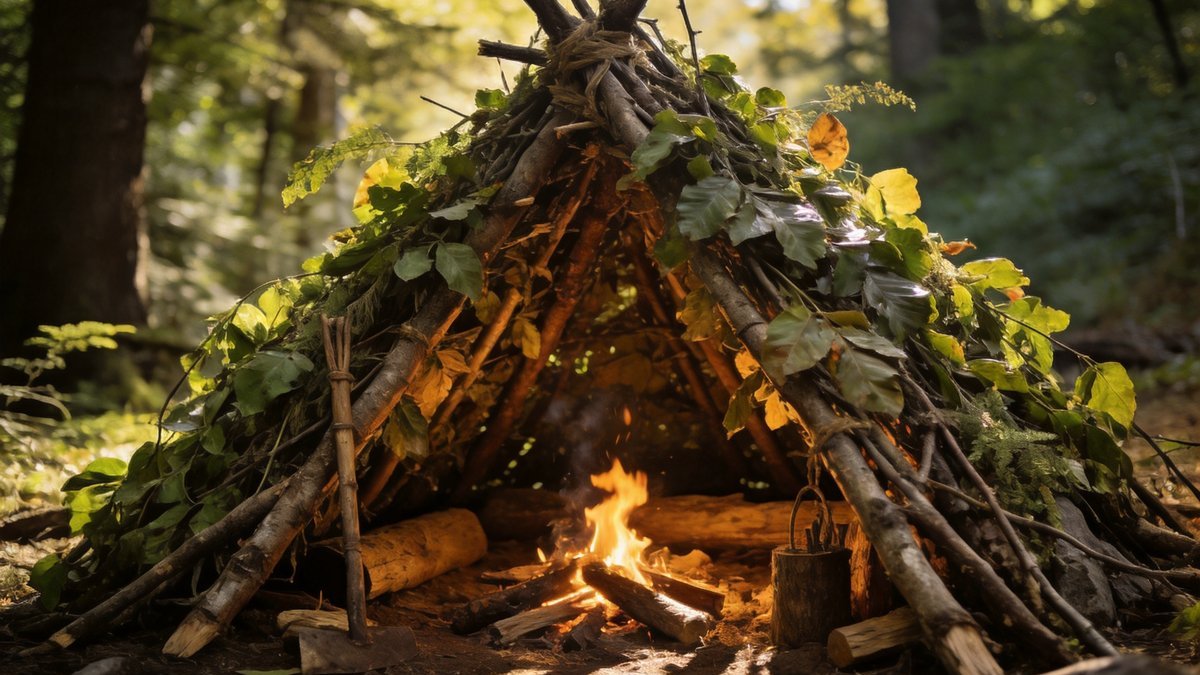
The debris hut provides the most effective natural shelter. Start by finding a fallen log or creating a ridgepole between two trees. The ridgepole should angle for rain runoff. Create a rib structure by leaning branches against both sides, forming an A-frame. Cover with 2 to 3 feet of dry leaves, grass, or pine needles. The thicker the insulation, the warmer the shelter. Create a small entrance at the wide end, angled so wind does not blow inside. The debris hut traps body heat, raising interior temperature 20 to 30 degrees above outside when properly constructed.
The lean-to provides quicker construction than a debris hut. Find two trees 6 to 8 feet apart. Place a horizontal ridgepole between them at 3 to 4 feet high. Lean branches at a 45-degree angle against the ridgepole. Layer the roof thickly from the bottom up, overlapping each layer. Build a fire reflector on the open side using stacked logs. A lean-to requires less material but provides less complete insulation than a debris hut.
A quinzhee is a hollowed-out mound of snow. Pile snow into a mound 6 to 8 feet in diameter and let it settle. Use 12-inch sticks as depth markers. Tunnel in from the downwind side, hollowing the interior while maintaining minimum 12-inch walls. A snow cave is dug into an existing snowbank. Both maintain interior temperatures near freezing regardless of outside conditions. Avoid building under trees or in avalanche-prone areas.
A natural overhang or rock ledge provides immediate wind protection. Enclose open sides with branches or your pack. A tube tent from a large trash bag provides waterproof shelter. Site selection matters: avoid low spots where cold air pools, stay away from exposed ridges, and check for overhead hazards.
The biggest mistake is not gathering enough insulation. A debris hut with 6 inches of leaves provides almost no insulation because leaves compress. You need 2 to 3 feet of loosely piled debris.
The second biggest mistake is getting wet. Wet clothing conducts heat away 25 times faster than dry clothing. Your shelter must keep you dry above all else.
Choosing the right location determines shelter effectiveness. Look for natural windbreaks like rock outcroppings, dense tree lines, or hillsides. Avoid ridge tops where wind exposure is highest and valley bottoms where cold air settles at night creating frost pockets. In mountain terrain, cold air drainage means the warmest spots are often mid-slope rather than at valley bottoms. Check for overhead hazards before committing to a site: dead branches (widowmakers), loose rocks on slopes above, and avalanche paths in winter conditions.
Drainage is critical for comfort and safety. Avoid depressions that collect water during rain, dry creek beds that can flash flood during storms, and areas with exposed roots that indicate erosion. Build on a slight slope to encourage water runoff. Orient the shelter entrance away from prevailing wind, typically east or southeast in most North American mountain ranges. Consider sun exposure: a south-facing slope receives more sunlight and stays warmer, while north-facing slopes retain snow longer and stay cooler. In a survival situation, prioritize wind protection and insulation over comfort, but site selection still makes the difference between a survivable night and a dangerous one.
Ground insulation is the most critical factor in shelter warmth. A surprising amount of body heat is lost through conduction to the cold ground, even through a thick sleeping pad. Layer dry leaves, pine needles, or grass at least 6 inches deep beneath your sleeping area. If you have a space blanket or emergency bivvy, place it under your bedding to reflect body heat upward. The insulation layer must be thick enough that you cannot feel the ground through it when lying down. In snow environments, pack the floor smooth and let it harden before laying insulation to prevent melting and refreezing.
Inside the shelter, fill gaps between your body and the walls with additional debris for insulation. The more completely you fill the interior space, the less air volume your body needs to heat. Cover yourself with any available dry material: poncho, emergency blanket, extra clothing, or dry leaves. Loosely packed leaves provide better insulation than tightly compressed ones. If you have a plastic garbage bag, use it as a vapor barrier over your sleeping bag or clothing to trap body heat. In extreme cold, the vapor barrier technique improves sleeping bag warmth by 10-15 degrees by preventing moisture from evaporating away from your body.
The type of emergency shelter you build depends on your environment and available materials. In forested areas, a lean-to shelter is quick to build and provides excellent protection from wind and precipitation. Find two trees 6-8 feet apart, lash a ridge pole between them at waist height, and lean branches against the ridge pole at a 45-degree angle. Cover the framework with leaves, bark, or a tarp if available. The open side faces away from the wind and toward a fire reflector wall for warmth. In deep snow, a quinzhee shelter is built by piling snow into a mound 6-8 feet in diameter, letting it set for an hour, then hollowing out the interior.
In desert and arid environments, a different approach is needed. Dig a trench shelter 2 feet deep and 6-7 feet long, oriented north-south to maximize shade. Cover the trench with branches, a tarp, or fabric, leaving a small gap for ventilation. The shade provided by a properly constructed desert shelter can reduce interior temperature by 15-20 degrees compared to outside conditions. In open, exposed terrain with limited natural materials, a debris hut is the most versatile option. Create a framework of branches in an A-frame shape and cover it completely with leaves, grass, and forest debris at least 2 feet thick for insulation.
A good knife is the most essential tool for shelter building. A fixed-blade knife with a 4-6 inch blade handles batoning wood, cutting branches, and processing tinder more effectively than a folding knife. Carry a folding saw for cutting larger poles and branches, as sawing is more energy-efficient than chopping with a knife. A length of parachute cord or natural cordage is invaluable for lashing structural elements together. If you have neither cordage nor a knife, look for vines, green tree shoots, or roots that can be twisted into serviceable cordage. Cedar bark strips soaked in water become flexible and strong when dried.
Efficient shelter building follows a systematic process. First, gather all materials before starting construction so you can work continuously. Collect structural poles first, then insulating materials, and finally covering materials. Build the framework at least 50 percent larger than you think you need, as interior space shrinks significantly once insulation layers are added. Test the structure's stability before adding insulation by applying weight and shaking the framework. Time your shelter building to finish at least one hour before sunset, as darkness makes material gathering exponentially harder and increases the risk of injury. A well-built shelter takes 1-2 hours to complete.
A well-built debris hut takes 2 to 3 hours. Start at least 3 hours before sunset. Practice at home to understand material requirements.
Use rocks for wind protection, dig trench shelters, and use your clothing and emergency bivvy for personal insulation in deserts or alpine areas.
Stay with your vehicle if stranded near it. A vehicle provides immediate shelter and visibility for rescuers.
Stuff dry leaves inside your clothing layers. Exercise gently before entering the shelter. Use emergency blankets to reflect body heat.
A well-designed survival kit fits in a small pouch but contains items that address the top priorities: shelter, water, fire, and signaling. Include a space blanket or emergency bivvy for shelter, a reliable fire starter like a ferro rod, water purification tablets, a whistle for signaling, and a small first aid kit. Carry this kit on every outdoor adventure, even short day hikes, because emergencies rarely happen when you are fully prepared.
Survival experts agree that mindset often determines outcomes more than gear or skill. The will to survive keeps people alive in situations where rescue seems impossible. Focus on small, achievable goals rather than overwhelming yourself with the full scope of the situation. Use the STOP acronym: Stop, Think, Observe, Plan. Take deliberate action rather than panicking. Many survivors credit their positive attitude and refusal to give up as the deciding factor.